
Last updated: September 11, 2026
Key Takeaways
- Identity conditioning, not prompts or seeds, reliably keeps the same face across poses, outfits, and lighting in Stable Diffusion.
- IP-Adapter FaceID, InstantID, ControlNet Reference-Only, ReActor, and LoRA each trade off speed, fidelity, and flexibility; stacking methods significantly improves consistency.
- Realistic skin needs careful settings: moderate CFG, controlled hires-fix denoise, and conservative face-restoration weights.
- LoRA training delivers the strongest long-term consistency for recurring characters but requires a varied dataset and careful weight tuning.
- Identity conditioning is the foundation for consistent characters across different scenes, outfits, and lighting setups.
How To Get Consistent Realistic Faces With Stable Diffusion: The Four Methods
These four primary identity-conditioning methods cover most Stable Diffusion use cases:
- IP-Adapter FaceID, best for fast, single-reference consistency on SD1.5 and SDXL
- InstantID (SDXL), best for high-fidelity SDXL portraits with tighter angle generalization
- ControlNet Reference-Only, best no-model fast path that requires no additional downloads
- ReActor, best for post-generation face swap when generation-time conditioning has already drifted
LoRA training sits above these methods for recurring characters at scale and appears in its own section below.
How To Generate The Same Face In Stable Diffusion (And Why Your Seed Is Failing)
A locked seed reproduces the same image only when the prompt and all settings remain identical. Four runs of the identical prompt produced four different women, with a pairwise pixel difference roughly 40 times greater than a truly identical pair. The prompt did not produce four versions of one photo; it produced four separate photos sharing a description. The seed locks the noise pattern, not the identity.
When the prompt changes, such as a new pose, a different outfit, or a shifted scene, the denoising trajectory changes. The model then re-samples a face from the constrained space the prompt describes. Text like “brown hair, green eyes, oval face” still admits millions of faces, and each generation samples randomly from that space.
This happens because diffusion models have no concept of “the same person”: every generation is a new probabilistic sample from latent space. Without explicit conditioning such as a reference image, a LoRA, an IP-Adapter, or a subject-lock feature, the model generates a plausible face in the described style rather than a specific character.
Use this insight when you have generated one portrait you like and cannot reproduce it. Stop re-rolling prompts. The fix is identity conditioning, not prompt refinement.
IP-Adapter FaceID: Fast, Single-Reference Consistency
IP-Adapter FaceID is a specialized IP-Adapter variant that uses InsightFace to extract a face-specific embedding from a single reference image and injects it into the diffusion model via ControlNet-style conditioning. This approach bypasses prompt-based face description entirely. In aiofm.info’s 2026 guide, IP-Adapter FaceID appears as Method 1 for character consistency, ranked as the fastest to set up but lowest on identity fidelity, and it remains the most flexible option across SD1.5 and SDXL.
The preprocessor is the InsightFace face-recognition model. In AUTOMATIC1111 or Forge, the preprocessor is ip-adapter_clip_sdxl_plus_face and the model is ip-adapter-faceid-plus_sdxl. FaceID Plus and V2 require a companion LoRA loaded at a strength matching the FaceID strength (0.7–0.9); without it, the FaceID effect is weaker.
For ControlNet, low strength around 0.3–0.4 gives loose guidance, while 0.8–1.2 provides strict adherence to the control image. A 100-image grid sweep found that portrait shots hold at 0.7–0.85, half-body needs 0.85–0.95, and full-body shots want 0.95–1.10. The same FaceID setting behaves differently across compositions because face pixel area drives the optimal weight.
Reference image requirements are specific. Use at least 512×512 (some guides recommend 1024×1024), a front-facing or slight three-quarter angle, a face occupying at least 30% of the frame, under even neutral lighting. InsightFace processes the face at 112×112 internally; below 512 the embeddings get noisy.
Use this when you need fast, one-off consistency from a single reference on SD1.5 or SDXL without training anything.
When you need higher fidelity on SDXL, InstantID builds on the same face-embedding idea and adds spatial keypoint conditioning.
InstantID For SDXL: High-Fidelity Portrait Identity
InstantID delivers high-fidelity identity preservation for SDXL portraits. Developed by the InstantX Team at Xiaohongshu Inc. and Peking University (arXiv 2401.07519), InstantID combines IP-Adapter-style face embeddings with a ControlNet conditioned on five facial keypoints. That double signal, semantic identity plus spatial landmarks, holds the face across three-quarter and profile angles where IP-Adapter FaceID alone struggles.
InstantID works only with SDXL. Flux users must use PuLID instead. On a 24GB A10 GPU, SDXL with InstantID takes roughly 13 seconds per 1024×1024 image versus about 10 seconds for vanilla SDXL, which is approximately 30% slower.
Starting settings: adapter strength 0.8 and ControlNet strength 0.5. Strength above 0.95 over-locks the identity so every generation resembles a portrait of the reference even when stylistic variety is wanted. For maximum identity lock, use adapter 0.95 and ControlNet 0.7. For an identity nudge with strong prompt control, use adapter 0.6 and ControlNet 0.3. Base sampler settings of dpmpp_2m_karras, 30 steps, and CFG 5–6 are recommended because InstantID adds its own conditioning pressure.
Use this when you are working on SDXL, need tighter angle and expression generalization than FaceID provides, and have the compute budget for an extra ControlNet pass. If managing these settings feels like too much overhead, Sozee handles identity conditioning without any of this configuration.
ControlNet Reference-Only: The No-Model Fast Path
ControlNet’s reference-only preprocessor transfers identity and attention focus from a reference image without downloading additional model files. Style transfer effects become more pronounced with the related reference adain or adain+attn preprocessors. It uses the reference_only preprocessor, with a typical Control Weight around 1.0 that can be lowered to 0.7–0.8 for subtler influence. The Style Fidelity parameter controls how closely the output adheres to the reference style versus the checkpoint’s default style. Lower values allow more stylistic freedom while still anchoring the face structure.
This method is less precise than FaceID or InstantID because it encodes the whole reference image rather than a face-specific embedding. Identity hold is softer and degrades more quickly across dramatic pose or lighting changes. It requires no InsightFace, no companion LoRA, and no additional downloads.
Use this when you need a quick consistency pass without installing extensions, or when testing a reference before committing to a full FaceID or InstantID workflow. If generation-time conditioning has already drifted, ReActor offers a different approach by post-processing the finished image instead of conditioning the generation.
ReActor Face Swap: Post-Generation Identity Lock
ReActor performs post-processing face swap rather than participating in diffusion generation. It does not regenerate composition, clothing, or pose, which makes it more direct than InstantID or FaceID when the goal is to preserve a finished image and change only the face.
Pair ReActor with CodeFormer or GFPGAN for post-generation face restoration. Keep restoration weights at or below 0.5. Face restoration tools with weights above 0.7 push skin toward porcelain smoothness and directly create the doll-like look. Common causes of a plastic-looking swapped face include excessive restoration strength, a face that is too small in the target image, and mismatched angle or lighting between source and target.
Use this when generation-time conditioning has already drifted and you need to correct a finished image, or when the target image’s composition must be preserved exactly.
LoRA Training: Recurring Characters And Maximum Consistency
LoRA training delivers the tightest identity hold for recurring characters. A face LoRA dataset of 20–30 images at 1024×1024 square crops, one person per frame, with varied angles, lighting, and expressions is the recommended starting point. The Kohya_ss training tool is the standard for SDXL, with recommended parameters of network_dim 32, network_alpha 16, learning_rate 1e-4, and max_train_steps 2000.
A LoRA alone caps at around 85% consistency across a 100-image test, while adding IP-Adapter FaceID v2 significantly improves that score. The two tools work on different layers. The LoRA establishes the identity baseline, and FaceID refines it at inference time.
The critical warning: high LoRA strength causes the AI-face look. Beginners who max the weight to 1.0 get oversaturated, artifact-heavy images; starting at 0.6–0.7 yields cleaner results. When stacking a character LoRA with IP-Adapter FaceID, lower the FaceID weight to 0.7–0.75 and set character LoRA strength to 0.7–0.8.
Use this when you are building a recurring character who will appear across dozens or hundreds of images, and the training overhead is worth the higher consistency ceiling.
IP-Adapter FaceID Vs InstantID Vs LoRA: Choosing The Right Method
The table below compares the three main approaches across input requirements, base model compatibility, and best-fit use cases.
| Method | Input Required | Base Model | Best For |
|---|---|---|---|
| IP-Adapter FaceID Plus V2 | Single reference image | SD1.5 and SDXL | Fast one-off consistency, flexible across model families |
| InstantID | Single reference image, no training | SDXL only | High-fidelity portraits, angle and expression generalization |
| LoRA (Kohya_ss) | 20–30 varied images, training run required | Matched to training checkpoint | Recurring characters, maximum long-term consistency |
The decision framework is straightforward. For a single image or a short set on SD1.5 or SDXL, start with IP-Adapter FaceID Plus V2. For SDXL portrait work requiring tighter angle hold, use InstantID at adapter 0.8 and ControlNet 0.5. For a character who will appear across weeks of content, train a LoRA and layer FaceID on top. Single-method pipelines plateau at about 80% consistency; stacked pipelines reach significantly higher levels.
Among non-SD tools, Midjourney’s character reference system and DALL-E’s style consistency are simpler but offer less control over weight values and preprocessors. For creators who need consistent, realistic faces at scale without managing any of this stack, Sozee replaces the entire pipeline, covered in the section below.
How To Make AI Faces Look More Realistic
The plastic-skin, AI-beauty-filter look has specific causes and specific fixes. Realism forms the second half of the consistency pipeline and works best after identity is locked.
CFG scale is the primary culprit. High CFG scale pushes diffusion models toward oversaturated textures, waxy skin, and an uncanny polished surface; bringing CFG back into a moderate range, with 6–7 as a practical starting point, is a key fix.
Prompt terms to avoid: “flawless skin,” “8K masterpiece,” “perfect symmetry,” and similar superlatives instruct the model to amplify every feature into an exaggerated version of itself. Natural skin texture, visible pores, and subtle asymmetry are the targets. Describe the qualities of a real photograph: natural skin texture, visible pores, and subtle asymmetry.
Hires-fix denoise discipline: the denoise setting controls how much the upscaling pass can change the image. Keep hires-fix denoise low, typically 0.4–0.6, so the second pass stays faithful to the first. Higher values cause the model to reinvent the face from scratch during upscaling, destroying the likeness established by FaceID or InstantID and introducing the smoothed, reconstructed look that reads as plastic.
Face restoration over-correction: CodeFormer or GFPGAN with weights above 0.7 push skin toward porcelain smoothness; keeping weights at or below 0.5 preserves micro-texture. Use one upscaling pass maximum. Stacking two or three AI upscalers amplifies synthetic detail and erases remaining texture.
Stable Diffusion img2img keep face: for the img2img inpainting approach, a denoising strength between 0.45 and 0.6 preserves source pose and lighting; values above 0.65 cause the model to reinvent the face from scratch, losing natural asymmetries. Inpaint only the face region rather than the full image to preserve the surrounding composition.
Use this when your face is consistent but reads as AI-generated. Realism fixes applied after identity conditioning is locked produce the cleanest results.
Sozee: The Studio That Replaces The Extension Stack
The methods above give you control, but they also require managing extensions, node packs, weight values, preprocessors, companion LoRAs, and VRAM budgets. For creators who need consistent, realistic faces at scale, Sozee replaces the entire stack.

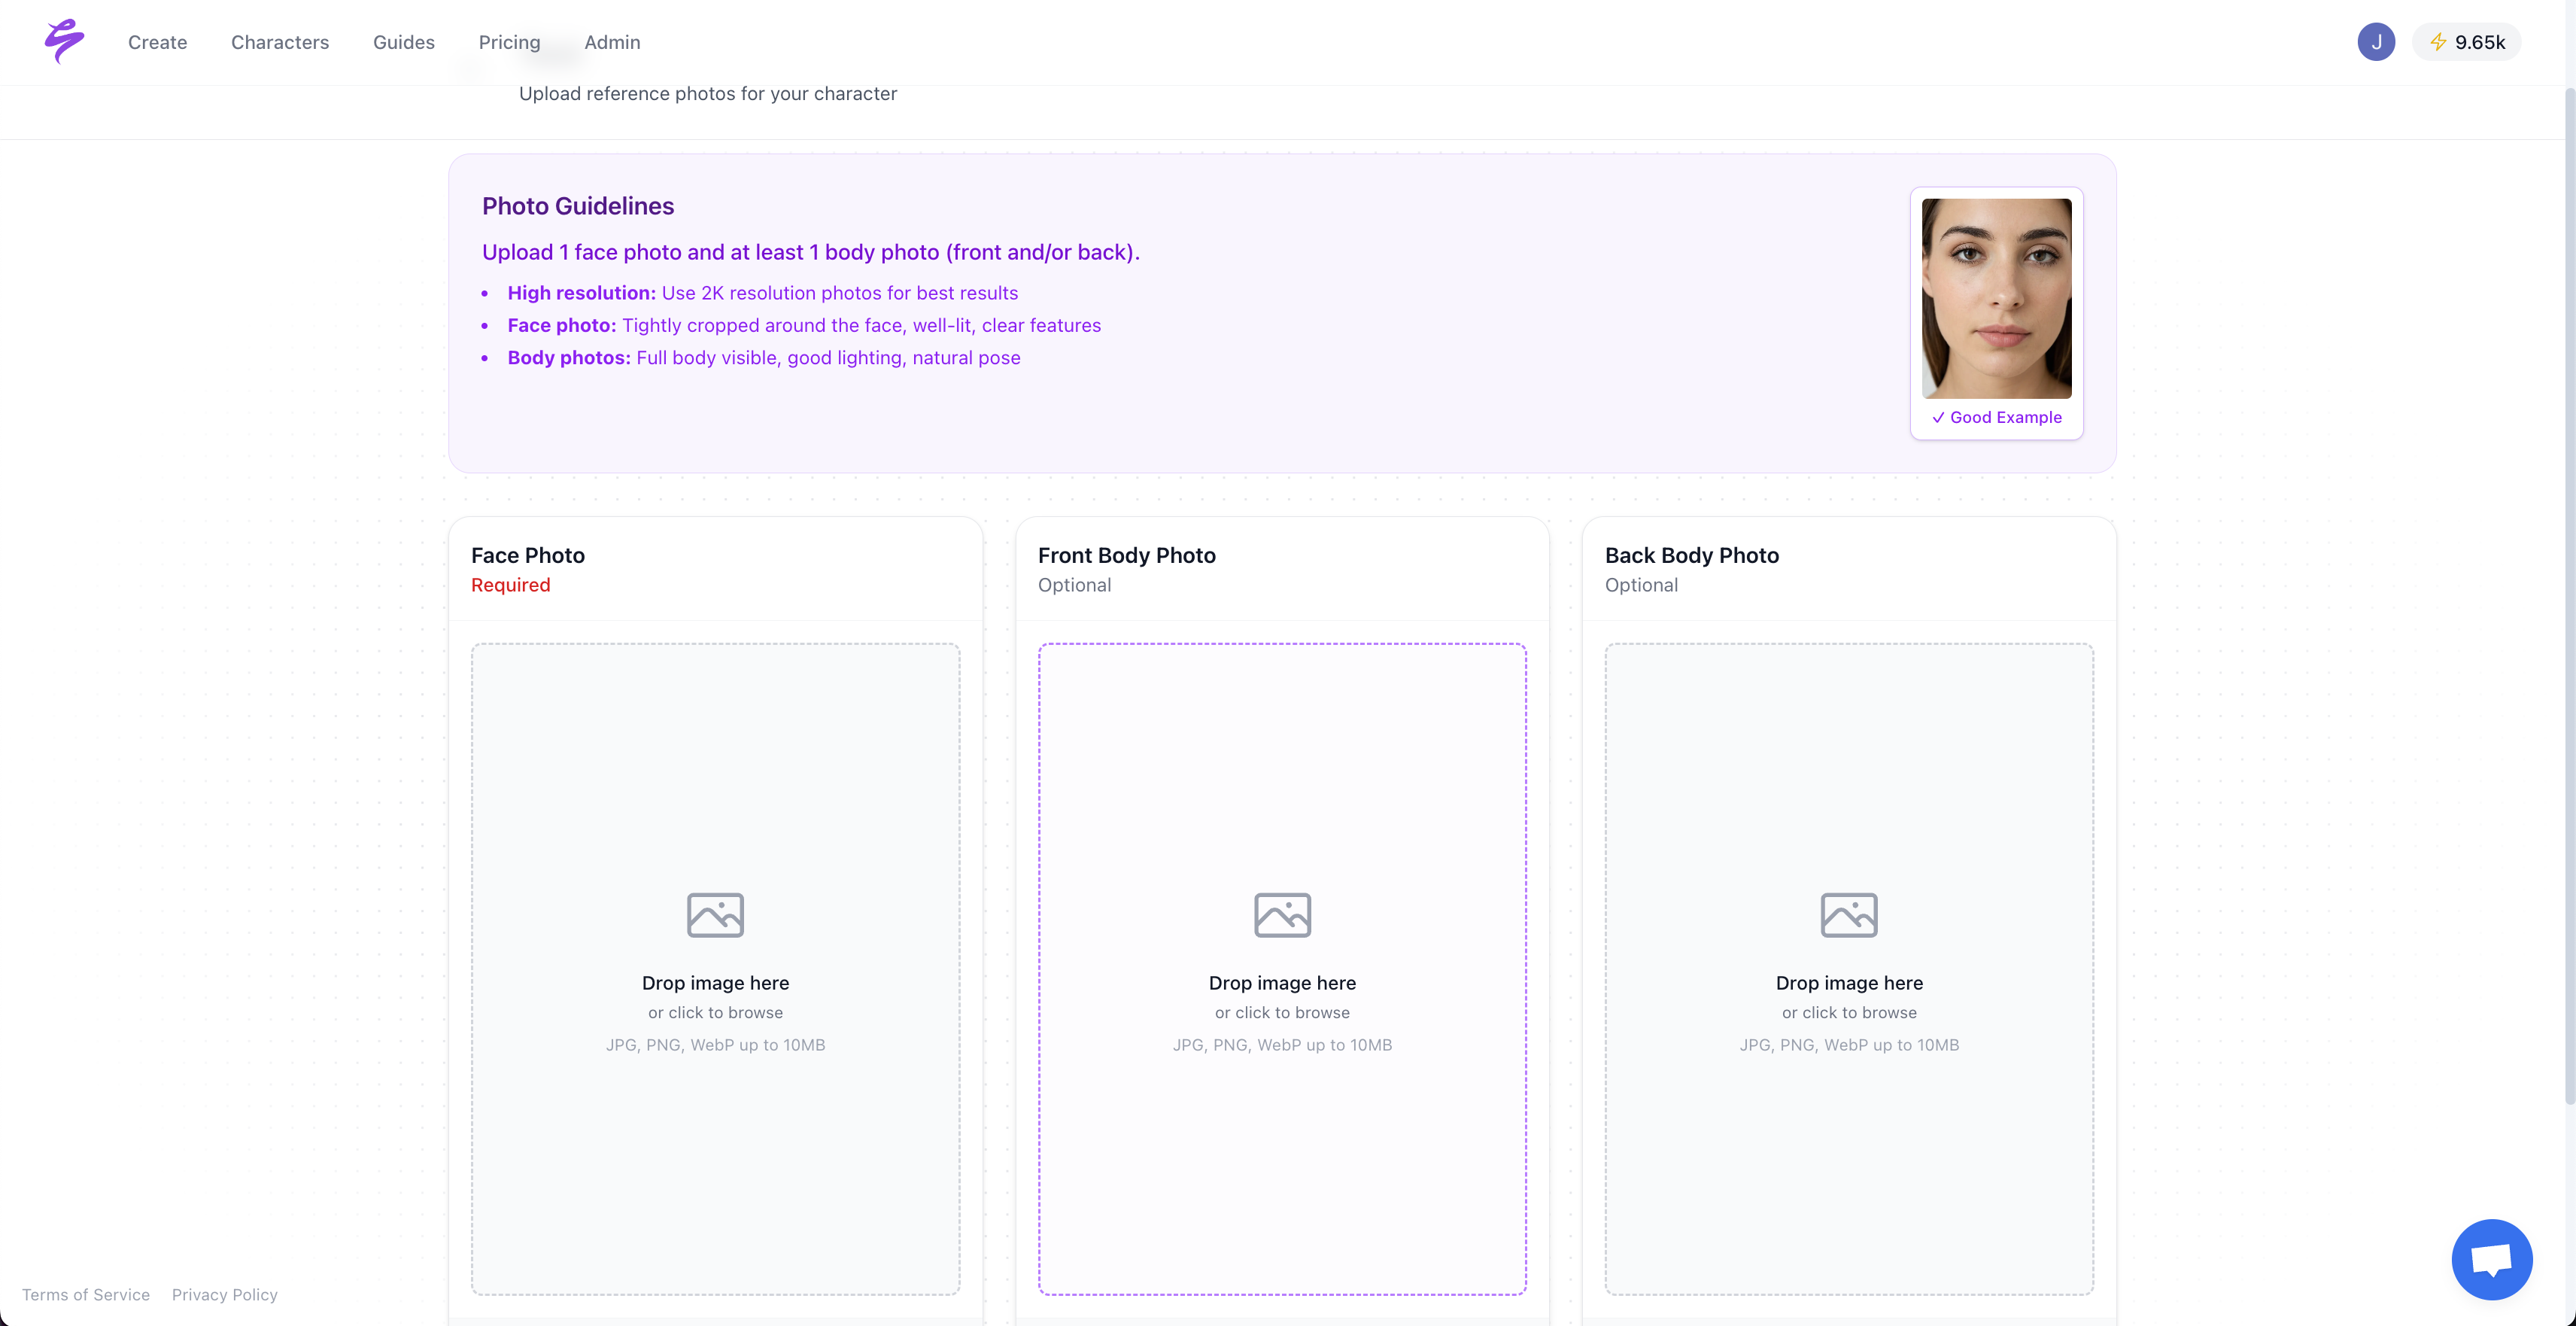
Sozee locks likeness from as few as three photos, with no training, no Kohya_ss, and no companion LoRA to wire. The same face holds across every frame, every set, and every week. That approach solves the face-drift problem at the architecture level rather than the settings level.
For creators who have no source photos, Sozee’s AI Character Builder generates an entirely original character, including origin, ethnicity, skin, eyes, hair, physique, and distinctive details, consistent from the very first frame. No reference image is required.
Stable Diffusion often requires re-rolling prompts and hoping the face returns. Sozee’s Photo Control turns the prompt bar into a director’s panel with five dimensions set deliberately every time: Setting, Outfit, Shot style, Expression, and Object. Each slot accepts an upload, a library pick, or an inline @-reference. The face stays locked while every other dimension moves.
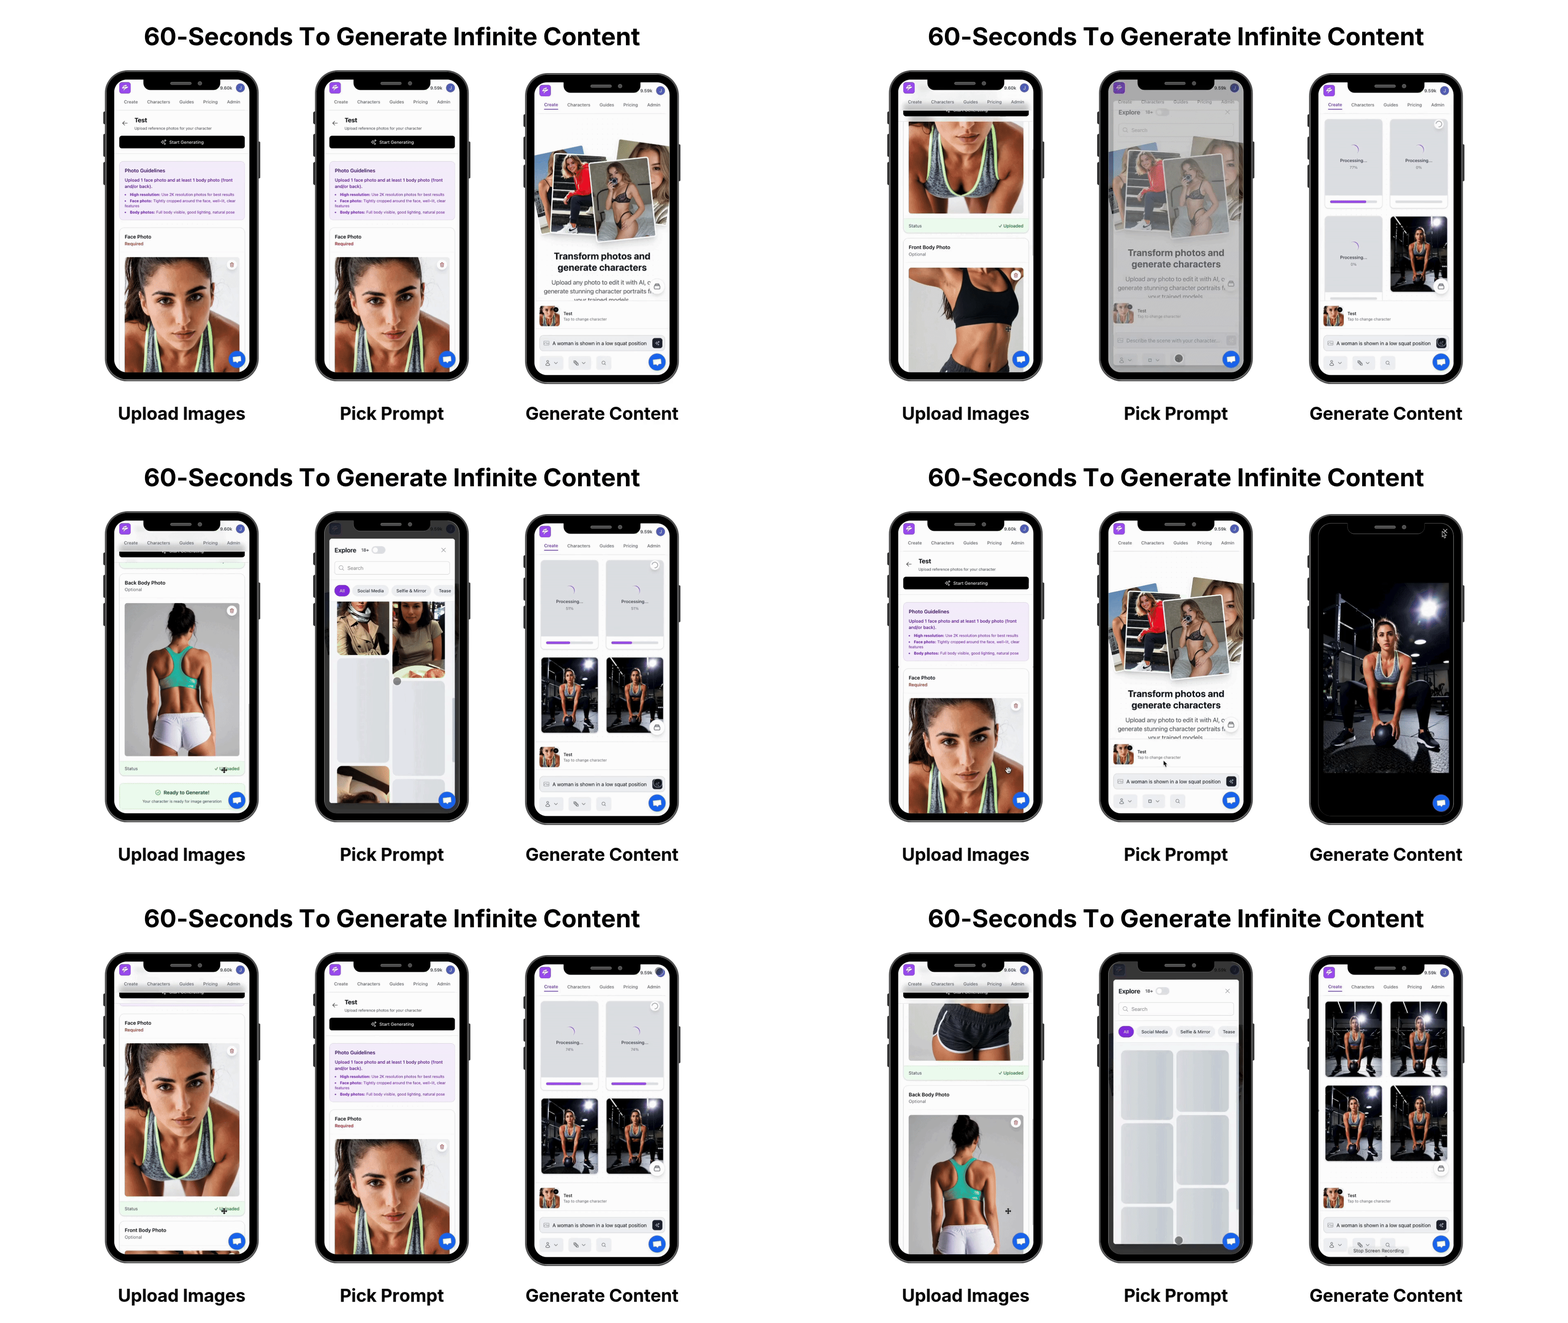
Photo Shoot takes a single image and builds a coherent set of up to ten around it. Identity, outfit, and environment stay locked while angle, pose, and expression move. That workflow turns one frame into a month of content and solves the recurring-character problem without a LoRA training run.
Sozee also includes reusable environments built from up to four reference shots, an outfit library, an object library, Live Mode for real-time character performance, the Scheduler for cross-platform publishing, and Analytics that separate what Sozee posted from what you posted. The Agent sets up the shoot from a half-formed idea, writing directly into the prompt bar and Photo Control panel so the conversation ends one tap from Generate.
Start creating consistent, realistic faces with Sozee.
Common Pitfalls And Pro Tips
- Re-rolling prompts hoping the face returns. There is no single image that a prompt “means”. The fix is identity conditioning, not prompt iteration.
- Assuming a seed locks identity. The seed locks the noise pattern. Change the prompt and the face changes. Save the seed for revisiting a specific output and use conditioning for carrying a face across new compositions.
- High LoRA strength causing the AI-face look. Start at 0.6–0.7 instead of 1.0. Maxing LoRA weight produces oversaturated, artifact-heavy images. Tune in 0.05 increments.
- High hires-fix denoise destroying likeness. Keep hires-fix denoise at 0.4–0.6. Higher values cause the model to reconstruct the face during upscaling and undo the identity conditioning applied during generation.
- Over-restoration from face-swap post-processing. CodeFormer and GFPGAN weights above 0.7 produce the porcelain look. Cap at 0.5.
- Using SD1.5 methods on SDXL checkpoints. A LoRA trained on SDXL will look completely broken on an SD1.5 checkpoint. InstantID is SDXL-only, and FaceID Plus V2 has separate SD1.5 and SDXL variants. Match models to checkpoints.
- Using a full-body reference image for FaceID. A full-body reference has low face information density that no weight can fully compensate for. Re-crop to a chest-up portrait before using it as a FaceID reference.
What Success Looks Like
A correctly configured identity-conditioning pipeline produces results that are recognizable without being described:
- The same face holds across poses, outfits, and lighting, and a viewer would say “that is the same person” rather than “those could be sisters.”
- Skin reads as real rather than plastic, with visible micro-texture, natural asymmetry, and an image that does not look like a retouched render.
- A recurring character can be reproduced weeks later from the same reference or LoRA without re-establishing the identity from scratch.
- A full set comes out of one frame, with angle, pose, and expression moving while identity, outfit, and environment stay locked.
Frequently Asked Questions
How To Keep Face Consistent In AI Image Generation?
Identity conditioning is the only reliable method. Use IP-Adapter FaceID Plus V2 for fast single-reference consistency on SD1.5 or SDXL, InstantID for tighter angle generalization on SDXL, or a trained LoRA for recurring characters. Prompt wording and seed locking do not preserve identity when pose, outfit, or scene changes because they describe categories of faces rather than specific ones. Sozee handles this architecturally: upload three photos and likeness locks across every frame without extensions or weight tuning.
How Can I Make AI Faces Look More Realistic?
Lower CFG scale into a moderate range. Avoid prompt terms like “flawless skin,” “8K masterpiece,” and “perfect symmetry” because these instruct the model to amplify features into an exaggerated, plastic version of itself. Keep hires-fix denoise at 0.4–0.6 to prevent the model from reconstructing the face during upscaling. Cap CodeFormer or GFPGAN restoration weights at 0.5 and use one upscaling pass maximum. Choose a photorealistic checkpoint such as RealisticVision, epiCRealism, or Juggernaut XL rather than an illustration or anime checkpoint. For img2img inpainting, keep denoising strength between 0.45 and 0.6.
Which AI Is Best For Character Consistency?
Within Stable Diffusion, the answer depends on base model and output volume. For SDXL one-off portraits, InstantID at adapter 0.8 and ControlNet 0.5 delivers tight angle generalization. For SD1.5 or SDXL with more flexibility, IP-Adapter FaceID Plus V2 at 0.8–0.9 is the most practical starting point. For recurring characters across large volumes, a LoRA trained on a varied dataset stacked with FaceID raises the consistency ceiling. For creators who need consistent, realistic faces at scale without managing any extension stack, Sozee provides locked likeness from three photos without training or weight tuning.
Does A Fixed Seed Keep The Same Face?
A fixed seed reproduces the same image only when the prompt and all settings remain identical. The seed locks the noise pattern, not the identity. When the prompt changes, such as a new pose, a different outfit, or a shifted scene, the denoising trajectory changes and the model re-samples a face from the space the prompt describes. Save seeds to revisit a specific successful output and use identity conditioning to carry a face across new compositions.
IP-Adapter FaceID Vs InstantID Vs LoRA: How To Decide
Use IP-Adapter FaceID Plus V2 for fast, one-off consistency on SD1.5 or SDXL from a single reference image. Use InstantID when working on SDXL and needing tighter identity hold across angles and expressions because it adds keypoint conditioning that FaceID lacks, at the cost of being SDXL-only and roughly 30% slower. Use a LoRA when building a recurring character who will appear across dozens or hundreds of images and the training overhead is justified by the higher consistency ceiling. Stack FaceID on top of a LoRA for production work so the LoRA establishes the identity baseline and FaceID refines it at inference time.
How Many Images Do I Need To Train A LoRA?
The minimum viable dataset for a face LoRA is roughly 15–30 images, though results improve sharply at 100 images, and the difference is most visible when changing pose or lighting. Dataset variety matters more than image count. Twenty photos from one session with the same lighting, angle, and expression give the model far less to learn from than fifteen genuinely different images. Coverage should span framing, angle, and at least two lighting conditions. 1024×1024 is the standard resolution for SDXL LoRAs, though trainers bucket different aspect ratios as long as images are genuinely close to the target resolution. Sozee removes this requirement entirely, because you upload three photos and likeness locks immediately with no training run required.
Build your first consistent character with Sozee today.
Conclusion: From Manual Stacks To A Dedicated Studio
Prompts and seeds do not lock identity. A prompt describes a category of faces, and a seed locks a noise pattern. Change either the prompt or the scene and the face drifts. Most guides document the identity-conditioning methods such as IP-Adapter FaceID, InstantID, ControlNet Reference-Only, ReActor, and LoRA. The second half of the pipeline, realism, requires separate discipline with moderate CFG, controlled hires-fix denoise, conservative face restoration, and a photorealistic checkpoint. Both halves must work together or neither delivers convincing results.
For practitioners who want to manage that stack, including extensions, node packs, companion LoRAs, weight ranges, and VRAM budgets, this guide provides the complete decision framework. For creators who need consistent, realistic faces at scale without that overhead, Sozee offers a dedicated studio. It delivers locked likeness from three photos, with no training, no extensions, and no prompt re-rolling. You direct a studio instead of pulling a slot machine.
Start creating consistent, realistic faces at scale with Sozee.