
Last updated: August 30, 2026
Key Takeaways for Scroll-Stopping AI Video
- Start with a high-resolution PNG or 90%+ JPEG photo and a simple, evenly lit background so the model has clean data for realistic motion.
- Write single-axis, small-motion prompts with timestamp anchors and clear camera language to reduce warping, jitter, and likeness drift.
- Apply a post-production pipeline of upscale, light blur, 35mm grain at 20–40% opacity, desaturation, and room tone to remove the plasticky AI look.
- Build a one-page continuity sheet before generating multiple clips so identity, wardrobe, lighting, and motion stay consistent across the sequence.
- Lock likeness across every frame and week with Sozee’s Photo Control and start your first locked-likeness shoot to turn one photo into a repeatable, scroll-stopping content engine.
Step 1: Prepare a Clean, High-Resolution Source Photo
The quality of the source image sets the ceiling for every clip that follows. Image-to-video models extract more detail from larger inputs and produce cleaner motion with fewer artifacts, so upload the highest-resolution version available.
Composition and lighting shape how natural the motion feels. Busy backgrounds confuse motion generation and create unwanted movement in areas that should remain static, so choose a simple, uncluttered background. Evenly lit photos with no harsh shadows or extreme contrast generate the smoothest motion, while harsh contrast frequently produces artifacts in the animated output. For portraits, front-facing or near-front-facing images provide the most facial data to the model; extreme angles reduce usable data and distort generated motion.
Before export, fix compression artifacts, scratches, and lighting problems in the source image, because clean inputs yield cleaner motion. Once the image is clean, preserve that quality by exporting as PNG or a high-quality JPEG at 90% or above, since screenshots and heavily compressed files reintroduce artifacts and amplify them during generation.
Common Pitfalls
- Uploading a screenshot or social-media-compressed JPEG instead of the original file
- Using a photo with a textured or illustrated background that the model will animate unintentionally
- Submitting a three-quarter or profile shot for a portrait clip, which reduces available facial geometry
- Skipping artifact removal, which turns compression noise in the source into amplified motion noise in the output
Step 2: Write Small, Plausible Motion Prompts
Every realistic motion prompt should begin with an anchor sentence stating subject, action, and setting in one clear sentence with no adjectives, because models weight early words more heavily and this front-loading gives the model scaffolding to simulate believable physics. Limit each prompt to one character, one action, and one setting, since multiple simultaneous actions force the model to simulate multiple physics systems and produce warping and jitter.
Prompts that specify both direction and speed qualifiers such as slow, gentle, subtle, or steady produce smoother motion than vague or abstract terms like “dynamic” or “cinematic.” For precise timing, use timestamp anchors such as “0–2s: subject stands still, looking left. 2–4s: subject turns head to face camera” to give the model explicit temporal structure and prevent actions from bleeding into each other.
Four ready-to-copy prompt blocks demonstrate timestamp anchoring, single-axis motion, and explicit camera lockdown:
Woman stands in a softly lit studio. 0–2s: still, eyes forward. 2–4s: slow blink, soft smile begins. Locked-off tripod shot, no camera movement. Keep face, lighting, and composition identical to the image. 35mm film, slight grain, warm color grade, shallow depth of field.Man sits at a café table. 0–3s: still, looking left. 3–5s: head turns slowly to face camera, weight shifts slightly in seat. Locked-off tripod shot, no camera movement. Keep face, lighting, and composition identical to the image. 35mm film, slight grain, warm color grade, shallow depth of field.Woman stands outdoors on a quiet street. 0–2s: still. 2–5s: hair moves gently in a slow breeze, single strand crosses cheek. Slow push-in, single axis forward only. Keep face, lighting, and composition identical to the image. 35mm film, slight grain, cool color grade, shallow depth of field.Product bottle on a white surface. 0–3s: still. 3–6s: light sweep moves slowly left to right across the glass surface. Locked-off tripod shot, no camera movement. Keep bottle shape, label, and reflections identical to the image. 35mm film, slight grain, neutral color grade.
Common Pitfalls
- Stacking two simultaneous actions, since adding a second action to a camera push-in increases face warping and reduces camera stability
- Using abstract style words instead of physics-based motion descriptors
- Omitting the “keep identical” lock on face, lighting, and composition, which invites likeness drift
- Skipping timestamp anchors for sequences longer than three seconds
Step 3: Use Camera Movement Language That Models Understand
Single-axis camera instructions such as “slow camera push left” or “gentle tilt upward” reduce variance more effectively than combined instructions like “slow dolly forward with slight pan left.” Every camera instruction should specify the axis, the direction, and the speed qualifier, and avoid extra stylistic fluff.
After the anchor sentence, add explicit camera direction specifying shot type, movement, or an explicit lack of movement such as “locked-off tripod shot, no camera movement,” plus approximate duration, because omitting camera instructions causes the model to guess and produce drifting or unmotivated motion. For most portrait clips, a locked-off shot or a single-axis slow push-in covering no more than 10–15 seconds is the safest choice. Large pose changes or walking motions force the model to invent new geometry and distort likeness, whereas micro-motions with low motion strength keep the face stable.
Common Pitfalls
- Combining two camera axes in one instruction, which is the fastest route to an unstable clip
- Omitting camera instructions entirely and letting the model decide
- Requesting camera movement longer than 15 seconds, which exceeds most models’ stable generation window
- Mixing camera movement with a subject motion prompt without timestamp separation
Step 4: Add Film Grain and Audio for Natural Texture
AI-generated video appears plasticky because generation models smooth away fine skin texture and over-resolve edges, causing skin to read as unnaturally clean and ultra-sharp. An ordered post-production pipeline applied to every clip before assembly fixes this problem.
The sequence must run in this order because each step builds on the last. Upscale first with a tool such as Topaz Astra to clean temporal artifacts and restore detail without exaggerating AI sharpness. Once the resolution is final, apply a very light gaussian blur just enough to take the digital edge off so you soften over-sharp AI edges without destroying restored detail. Next, layer a 35mm-style grain overlay at roughly 20–40% opacity to unify the texture across the frame. Finally, pull saturation down 10–15%, lift the blacks slightly, and push a warm or teal cast depending on the scene. Film grain unifies clips generated at different times or by different models into one consistent-looking film because every shot shares the same texture layer.
Audio completes the realism. Silent or music-only AI clips read as fake even when the image is solid, so layer a room tone or ambient bed under every shot, such as traffic hum, wind, or distant chatter, plus diegetic detail like footsteps or fabric sounds. Free tools such as DaVinci Resolve or CapCut are sufficient for color grading, film grain overlays, and speed adjustments.
Common Pitfalls
- Applying grain before upscaling, since corrections must sit on the final-resolution image
- Setting grain opacity above 40%, which becomes visible as texture rather than film character
- Skipping the audio bed entirely and relying on background music alone
- Applying sharpening or unsharp passes, which amplify the over-sharp edges that contribute to the plasticky appearance
Step 5: Edit Multi-Clip Sequences With a Continuity Sheet
Assembling multiple AI clips into a coherent sequence works best when you create a continuity sheet before generating a single clip. Build a one-page continuity sheet with a subject anchor, wardrobe anchor, environment anchor, lighting anchor, camera rules, motion rules, an approved reference frame, and a delivery rule so prompts stay aligned instead of turning into unrelated creative briefs.
The six continuity layers matter because they keep every shot aligned with that sheet. Track identity (face, hair, body shape), styling (wardrobe, accessories, colors), environment (location, weather, time of day), cinematography (lens, camera movement, framing), motion (direction, speed, action start and end), and delivery (aspect ratio, edit rhythm). Together, these layers cover what the viewer notices when a cut feels wrong.
At the review stage, watch the final second of the outgoing shot beside the first second of the incoming shot to check gaze direction, subject position, hand position, motion direction, lighting, and background geometry before assembling longer sequences. Export at 24 fps for a cinematic cadence. In documented AI productions, filmmakers averaged three generations per usable shot and retained only about five seconds from each 15-second clip, so budget generation credits accordingly and plan for a 25% usable-clip rate on first pass.
Common Pitfalls
- Starting generation before the continuity sheet exists, which guarantees drift
- Rewriting the entire prompt when continuity problems appear instead of repairing only the specific variable that drifted
- Skipping the cut-point review and discovering identity drift only after the full sequence is assembled
- Exporting at 30 fps when the grain and grade were calibrated for 24 fps cadence
Step 6: Use Sozee’s Photo Shoot and Animate Loop for Consistency
Steps 1–5 describe what any creator can do with generic tools, while Step 6 covers what generic tools cannot replicate. Sozee’s Photo Control locks five dimensions simultaneously, which are Setting, Outfit, Shot style, Expression, and Object, so likeness does not drift between frames, sets, or weeks. Upload three photos and Sozee reconstructs the likeness instantly, with no training and no waiting.
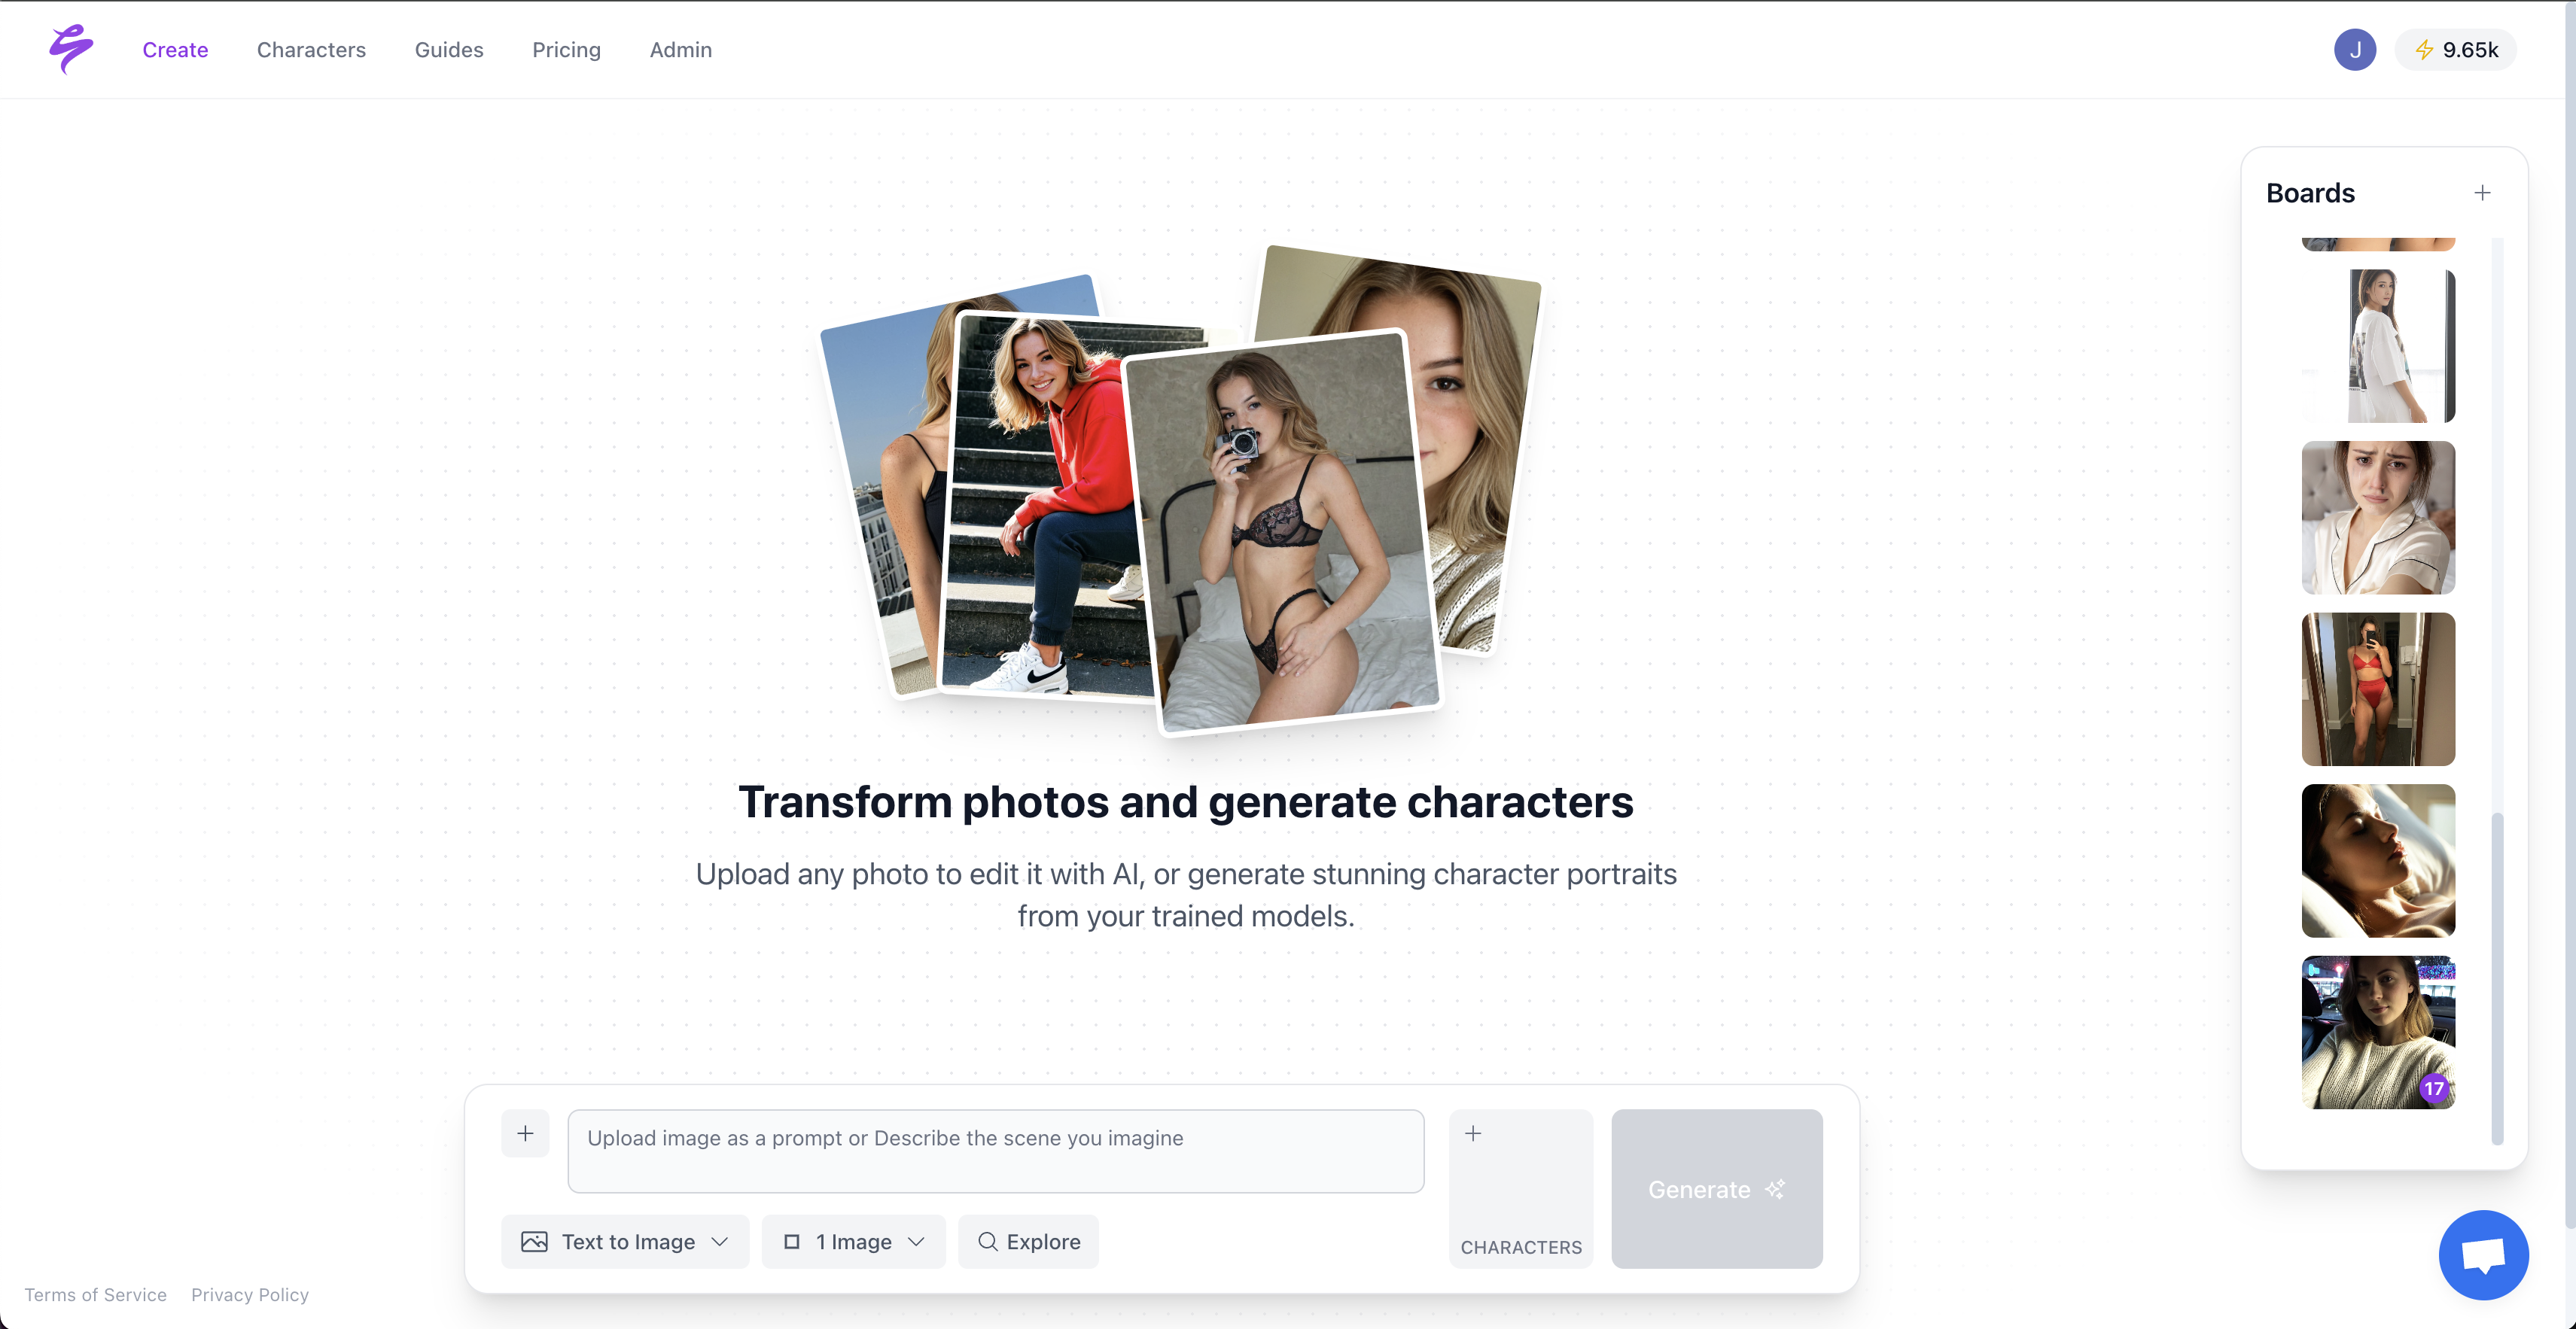
The workflow inside Sozee follows a specific sequence so likeness stays locked. Upload three high-res photos prepared in Step 1 to cast the character, which teaches Sozee the likeness you want to hold. Once the character is cast, set all five Photo Control dimensions for the first shoot to define the world around that character. With both character and world locked, use the Photo Shoot feature to generate a coherent set of up to ten images from a single frame, where identity, outfit, and environment stay fixed while angle, pose, and expression vary. Select the stills that will become video clips and use Animate to direct motion such as camera moves, gestures, and mood, all applied to an image whose likeness is already locked at the platform level.
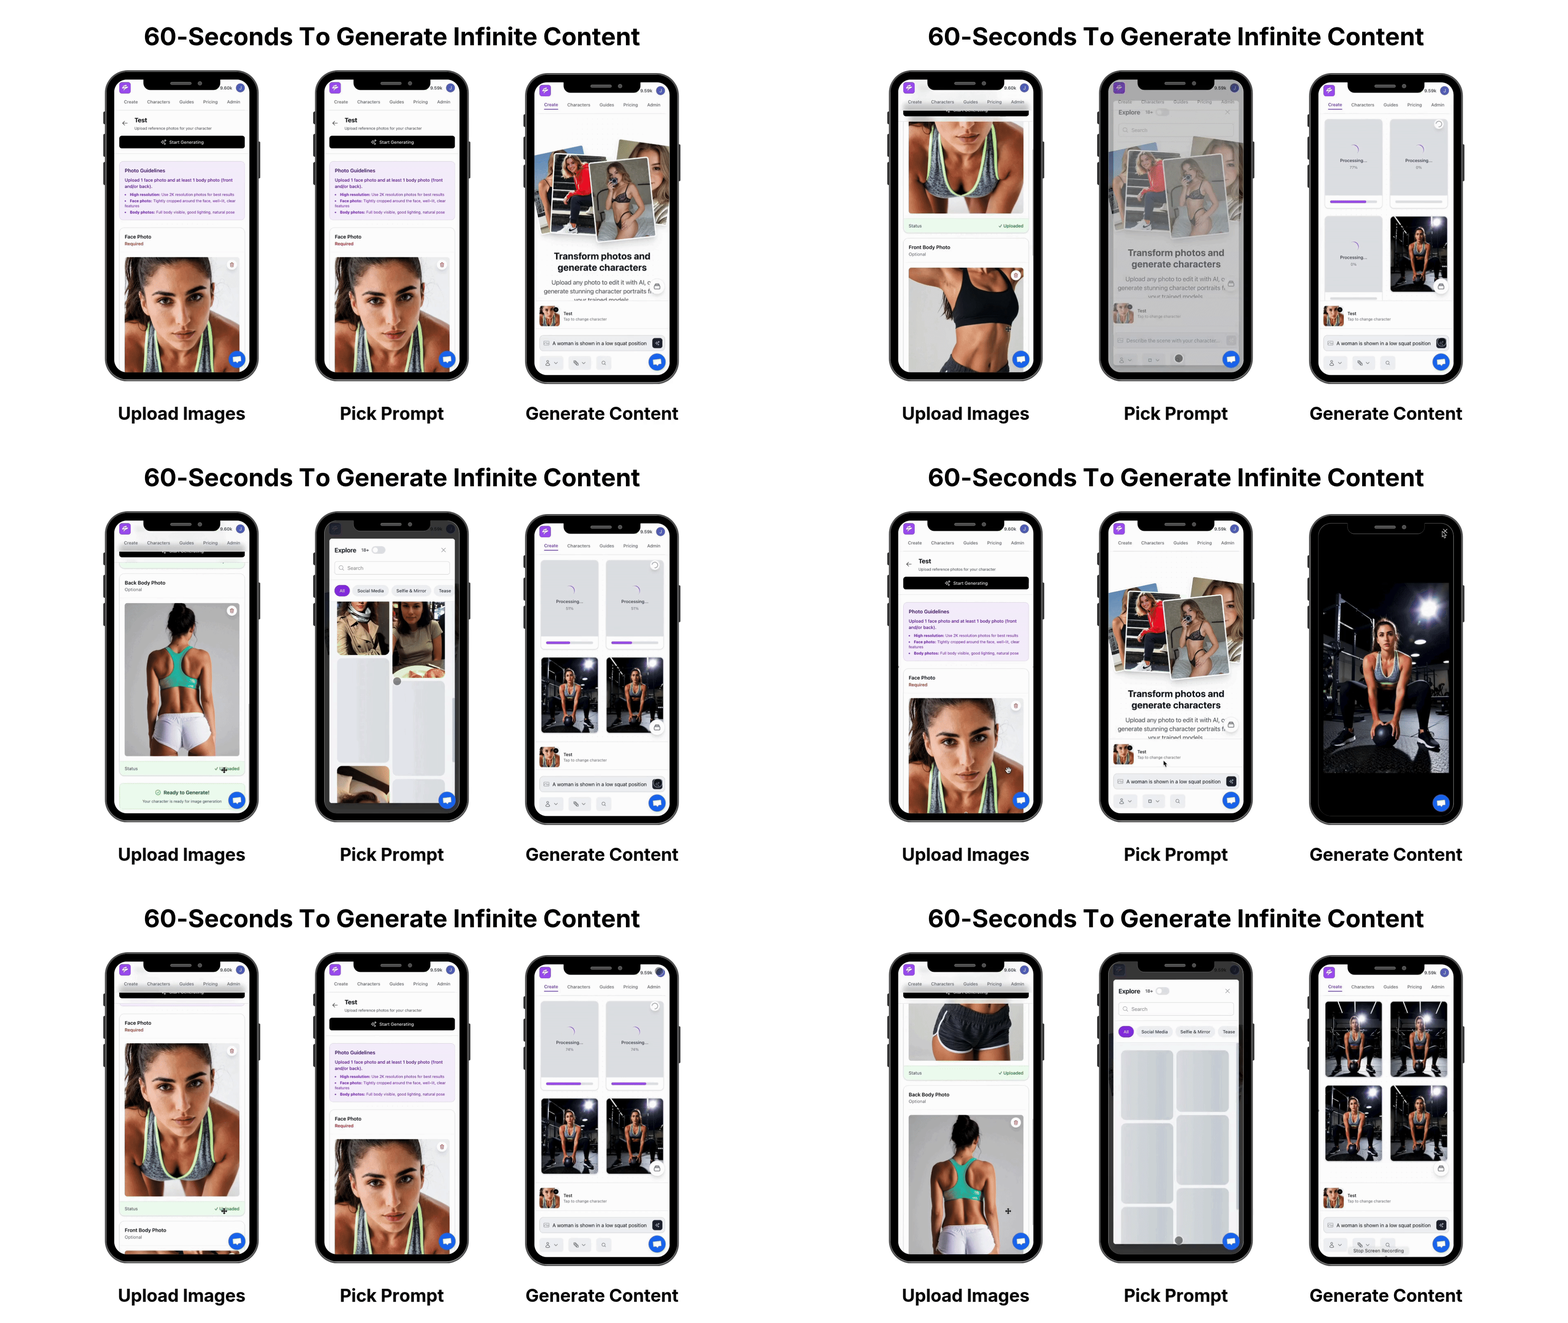
Reusable environments compound this advantage over time. Build a setting once from up to four reference photos and Sozee reads the room as a whole, so you can shoot in it indefinitely without re-describing it. Outfits assemble from one piece per category. Objects attach inline with @. When the weekly content plan is ready, the Sozee Agent reads the character, the library, and past performance, then proposes and produces the next shoot by writing into the real prompt bar and Photo Control panel so the session stays one tap from Generate.
Common Pitfalls
- Changing Photo Control dimensions between shoots without saving the previous configuration as a reusable asset
- Animating a still before reviewing it for the six continuity layers established in Step 5
- Rebuilding environments from scratch each session instead of saving them to the library after the first shoot
- Skipping the Agent for weekly scheduling and manually re-entering the same settings, which reintroduces the drift that Photo Control eliminates
Advanced Sozee Workflows for Faster Production
Build every environment, outfit, and object as a saved asset on the first use. The compounding effect is the point, because each shoot becomes faster when the world is already constructed. A setting built once can anchor an entire month of content across different expressions, shot styles, and objects without a single re-upload.
Creators running SFW-to-NSFW content arcs can use Sozee’s Photo Shoot feature to generate a full arc from one frame with the pacing and ceiling set by the creator. This approach removes the need for a separate tool, extra prompting, or manual work to keep the teaser and full set consistent.
For hands-off production at scale, the Sozee Agent functions as a conversational layer over the entire platform. It reads existing characters and library assets, then asks only about the gaps in a proposed shoot, and writes directly into the prompt bar and Photo Control panel so setup time drops. Agencies managing multiple creators can run each client’s roster from isolated workspaces under one login, with separate characters, vaults, connected accounts, and credits per workspace.
Frequently Asked Questions
How much does it cost to create realistic AI videos from photos on Sozee?
Sozee operates on a credit-based system accessible after sign-up. The platform is designed so that a full shoot, including locked-likeness image generation, animation, and scheduling, runs in a single session without exporting to additional tools. Because environments, outfits, and objects are saved and reused, the credit cost per piece of content decreases as the library grows. Creators who build their world once and reuse it across weekly drops get a lower effective cost per clip than those re-prompting from scratch each session.
Why do my AI videos still look fake even after I follow prompting guides?
The most common cause is skipping post-production finishing. Raw AI output is over-sharp, over-saturated, and too clean because generation models smooth skin texture and over-resolve edges. The fix is the ordered post-production pipeline detailed in Step 4, which covers upscale, blur, grain, and color correction in that sequence. Skipping any step, especially audio, leaves signals that audiences read as artificial even when the image itself is convincing.
Can I use old or low-quality photos to generate realistic AI video?
Low-quality source images produce lower-quality output because compression artifacts, harsh shadows, and extreme contrast in the source image become amplified during video generation. For old photos, run a restoration pass to remove scratches and fix lighting before uploading. Use the same export format recommended in Step 1 to preserve the restored quality. Front-facing, evenly lit frames with simple backgrounds give the model the most usable facial data and produce the cleanest motion. If the original photo cannot be restored to a usable standard, generating a new character in Sozee’s AI Character Builder, with no source photos required, is a faster path to consistent, realistic output.
What causes likeness drift between clips, and how does Sozee prevent it?
Likeness drift occurs at three levels: frame-level flicker where textures shimmer within a single clip, shot-level identity drift where the face or costume changes across a clip, and cross-scene incoherence where re-prompting scene by scene produces mismatched lighting and framing. Generic tools have no mechanism to prevent any of these because they treat each generation as independent. Sozee’s Photo Control locks five dimensions, which are Setting, Outfit, Shot style, Expression, and Object, at the platform level, so the same face, body, and world persist across every frame, every set, and every week without re-prompting or re-rolling.
Is 15 seconds enough for a realistic AI video clip, and how do I build longer content?
Fifteen seconds is a common generation ceiling per clip on most platforms. As noted in Step 5, most productions retain only about five usable seconds per generation, so longer content is built by assembling multiple clips rather than extending a single generation. The multi-clip workflow in Step 5, which uses a continuity sheet, cut-point review at the final and first second of adjacent shots, and 24 fps export, is the standard method. Sozee’s locked likeness means that identity, outfit, and environment stay consistent across clips without a continuity sheet entry for character appearance, which is the variable that causes the most re-rolls on generic tools.
Conclusion: Turn One Photo Into a Content Engine
The six-step workflow of high-res photo prep, single-axis small-motion prompting, explicit camera language, film grain and audio in post, multi-clip continuity editing, and Sozee’s locked-likeness consistency loop gives creators a repeatable process the current SERP does not provide. Generic tools give creators a slot machine. Sozee gives them a director’s panel with five dimensions set deliberately, a likeness that holds frame to frame and week to week, and a world built once that compounds in value with every shoot.
One photo, followed precisely through these six steps, produces footage that passes the scroll test on Instagram Reels and TikTok. A library of saved environments, outfits, and objects turns that one photo into a scalable content engine that runs without burnout, without re-rolls, and without a different face every generation.